Lessons
Deploy Go API to Render
In this lesson, we'll deploy our Go API to Render. Render is a really helpful service that takes away a lot of the complexity of deploying and infrastructure. We will configure a service that builds a Go application, and runs it.
For this tutorial, we are assuming you have a Render account.
Create a New Repository
We will create a new Github repository (You can use Gitlab too). This is where we store our code, and where Render pulls from.
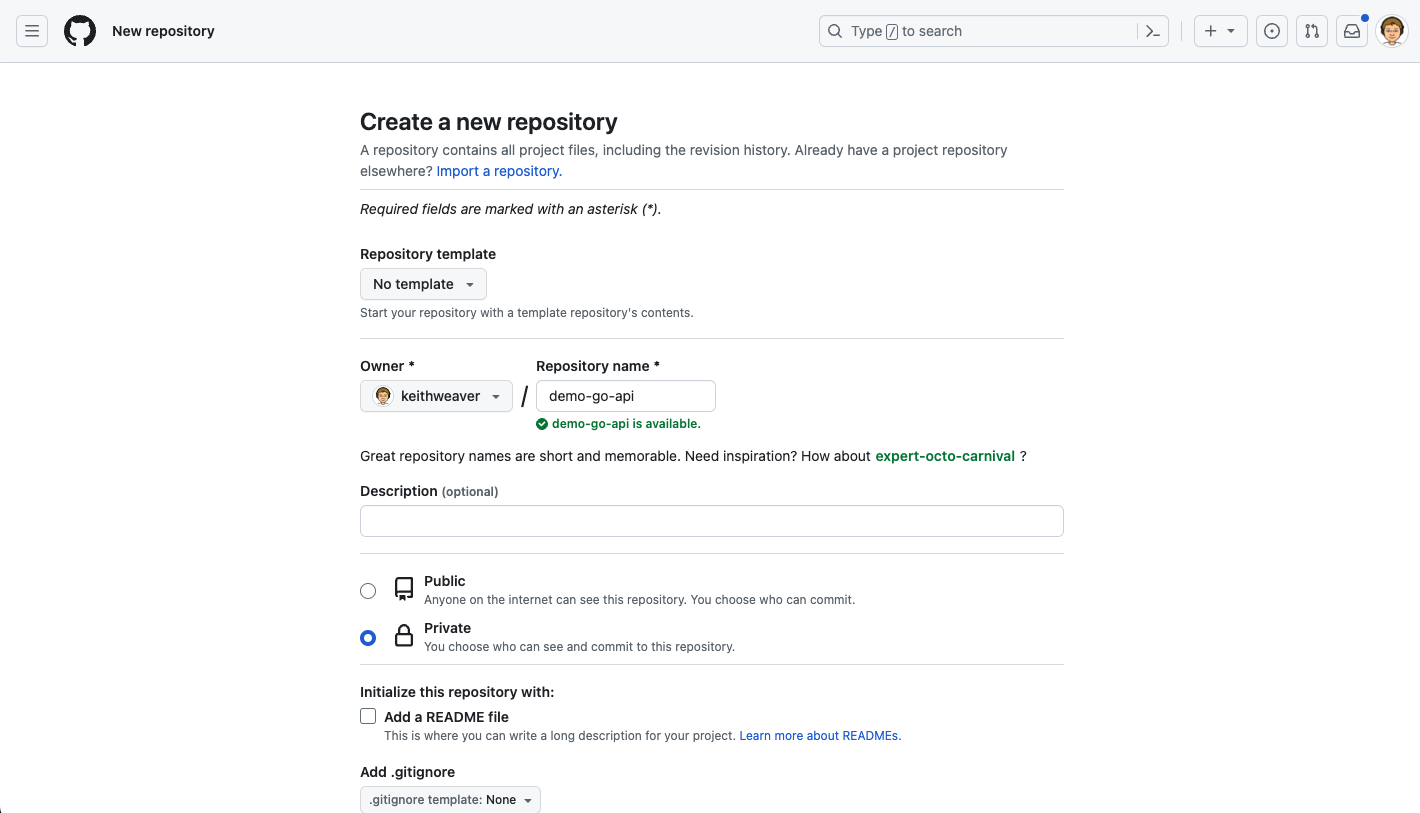
If you want to copy some code (it will be below), or you can use this boilerplate code. Give a star if you use it, and I explain it in more detail here.
The next set of steps is creating a basic Go API. If you already have one, you can skip to the next section.
Clone your repository to your Go workspace. For me, it’s ~/go/src/.
1 2git clone git@github.com:keithweaver/demo-go-api.git cd demo-go-api
We are going to initialise a new module.
1 2go mod init go mod tidy
We will add main.go to the root.
1 2 3 4 5 6 7package main import "fmt" func main() { fmt.Println("Hello world") }
We will start it up with:
1go run ./
We have a basic Go script running, time to add an basic endpoint. We will be using Gin. Run this command to install the module:
1go get github.com/gin-gonic/gin
We will update our main.go file to have an endpoint and router.
1 2 3 4 5 6 7 8 9 10 11 12 13 14 15 16 17 18 19 20 21 22 23 24 25package main import ( "fmt" "github.com/gin-gonic/gin" ) func main() { fmt.Println("Starting") router := gin.Default() healthAPI := router.Group("/") { healthAPI.GET("", healthCheck) healthAPI.GET("health", healthCheck) } router.Run(":8080") } func healthCheck(c *gin.Context) { c.JSON(200, gin.H{ "message": "OK", }) }
Once again, run it with:
1go run ./

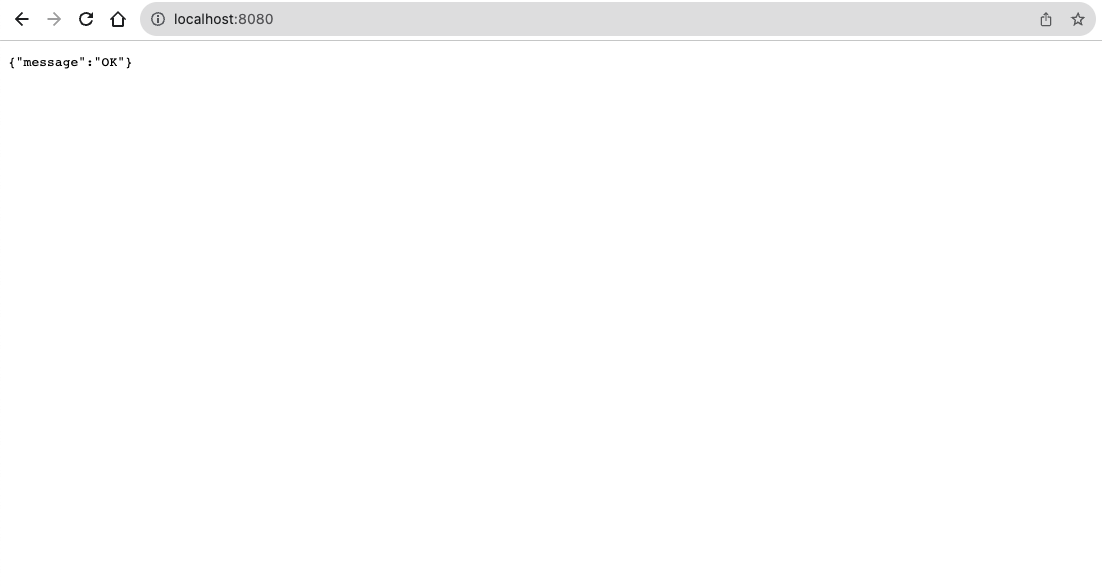
You can verify everything is setup by navigating to [http://localhost:8080](http://localhost:8080) in your browser.
You may want to add a .gitignore . Otherwise, push everything to your remote repository.
1 2 3git add --all git commit -m "Let there be light" git push
Create a new Service
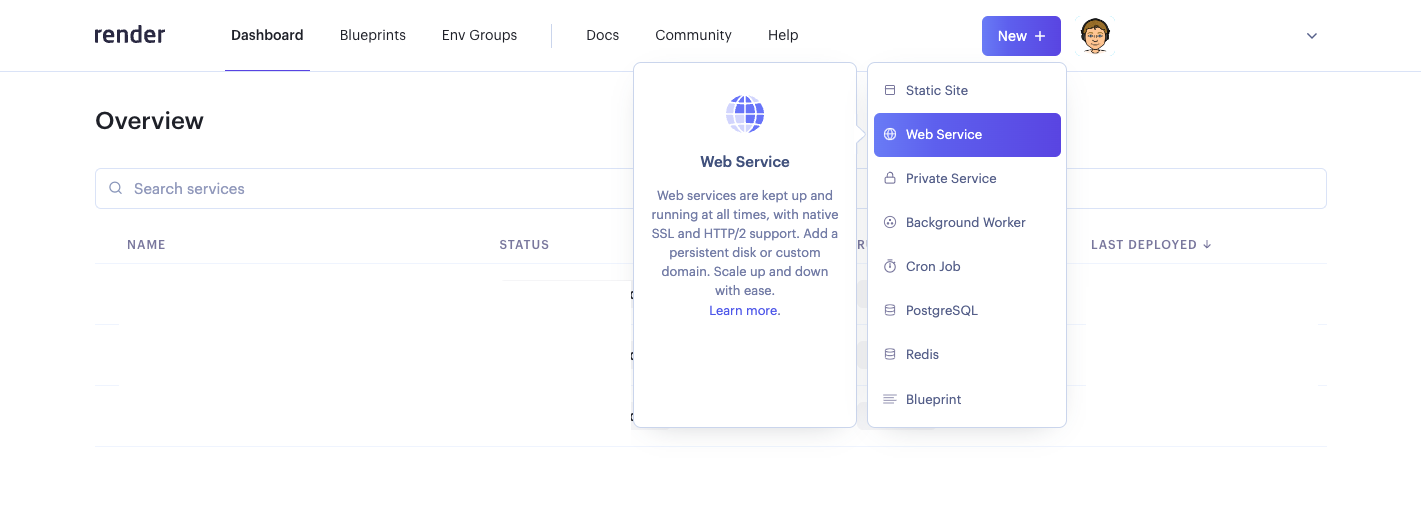
Sign into your Render account. In the navigation bar, hit “New”, then select “Web Service”. We want our service to be exposed to the public internet.
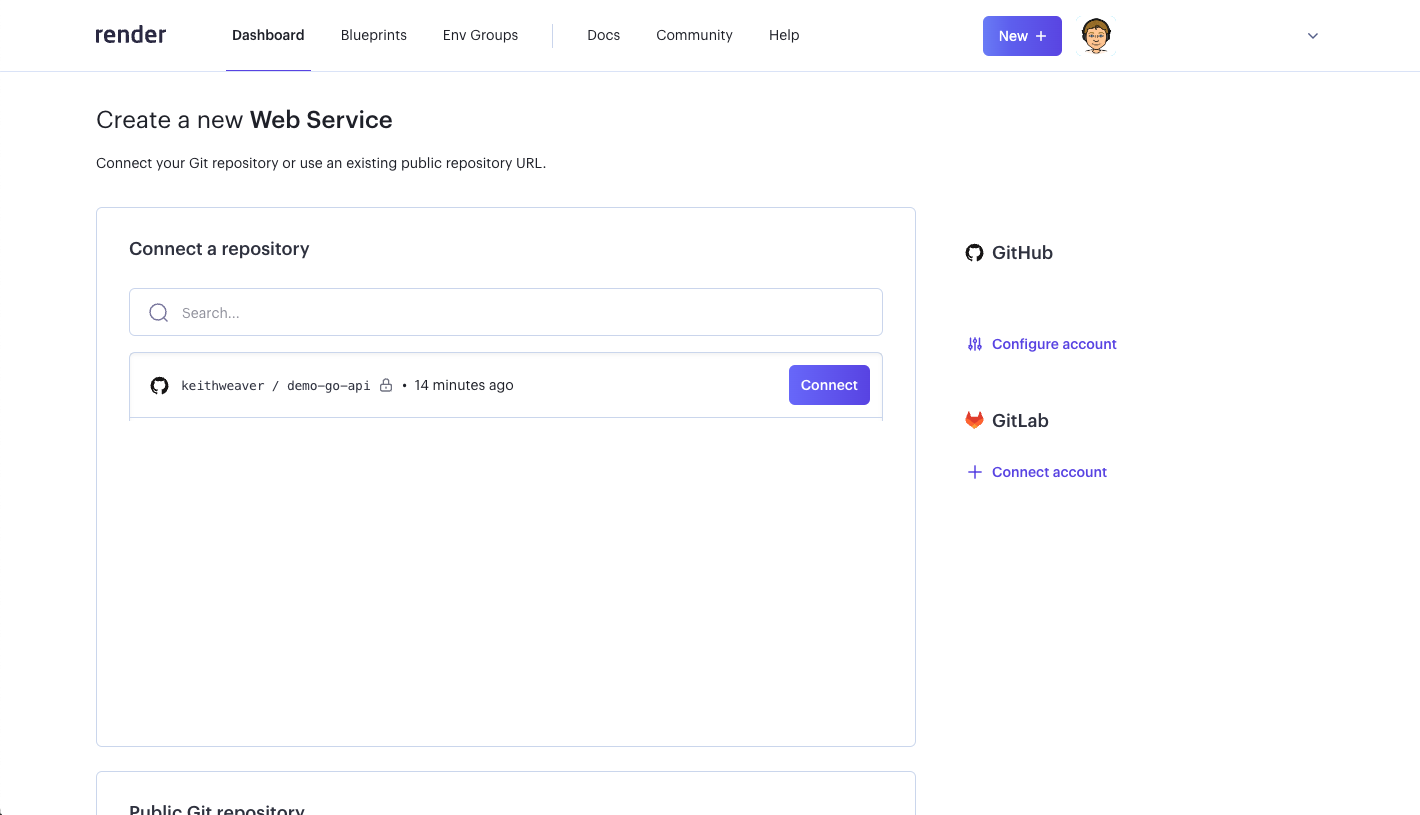
Navigate to the repository you want to connect, and hit the “Connect” button in line.
You will provide details about the service. For the name, make it something recognisable for you. The region should be close to your customers, or aligns with your other services (if you have them). I’m going to stick with “Oregon (US West)”. For me, it’s detected the Runtime is “Go”. For the build command, I usually test it out. On your local machine:
1go build -tags netgo -ldflags '-s -w' -o app
This builds an executable of your code. Then run it with:
1./app
You should see your API running. If this wasn’t successful on your local, it will definitely fail remotely.

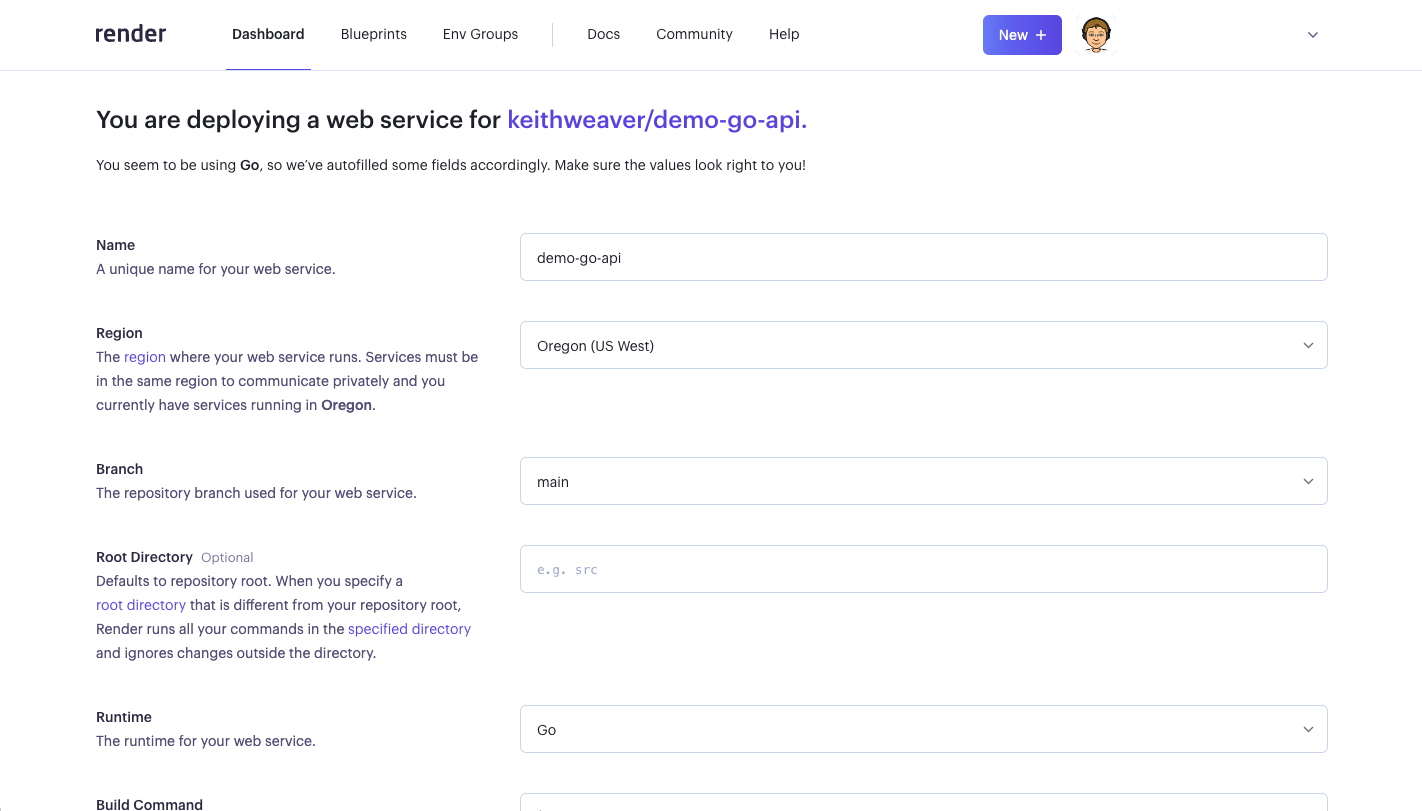
Select your size, then hit “Create Web Service”.
The service will build for the first time. Give it a few minutes. We will then navigate to the Render URL provided to confirm we can access it.
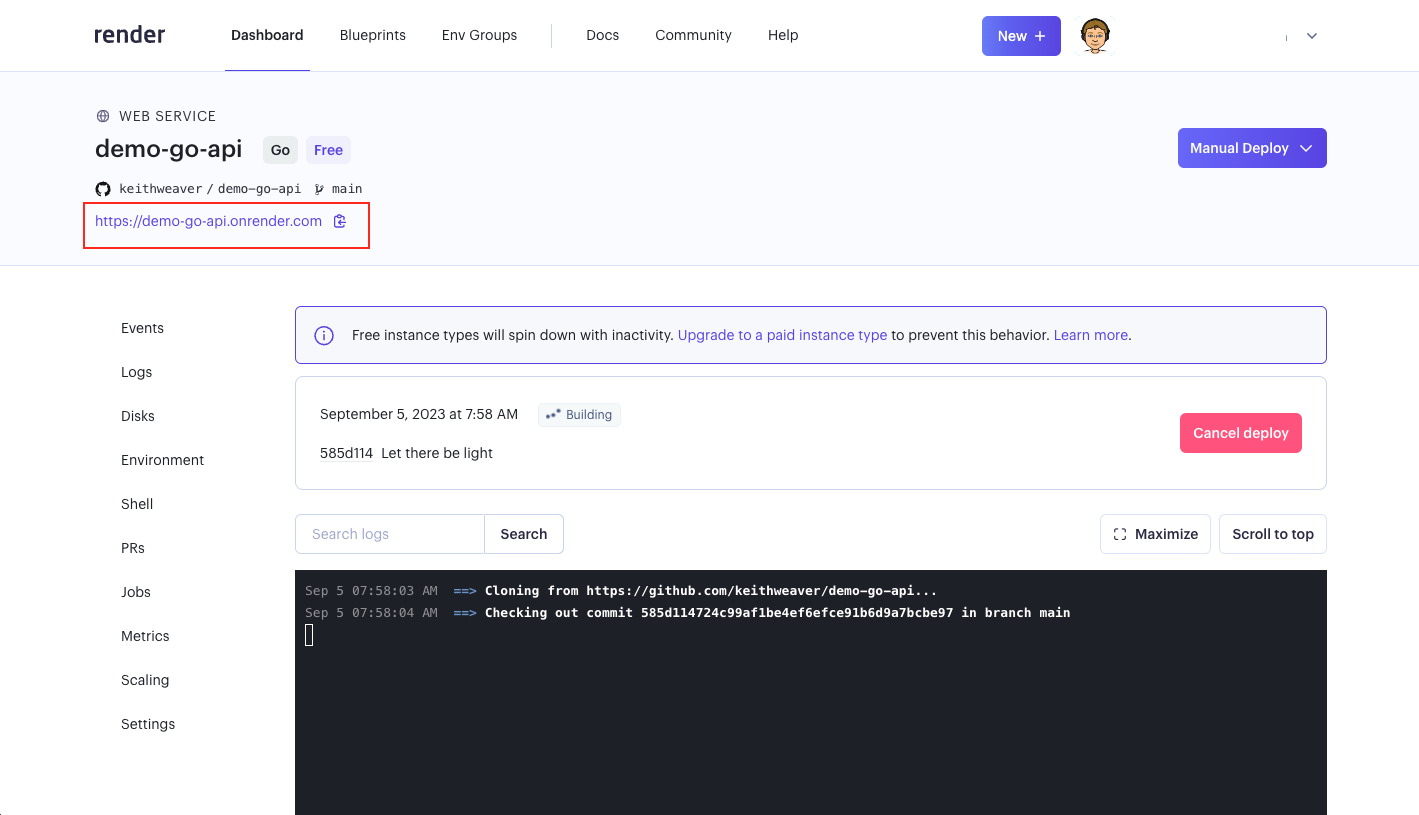
In the logs, you should see the same print out as your local machine.
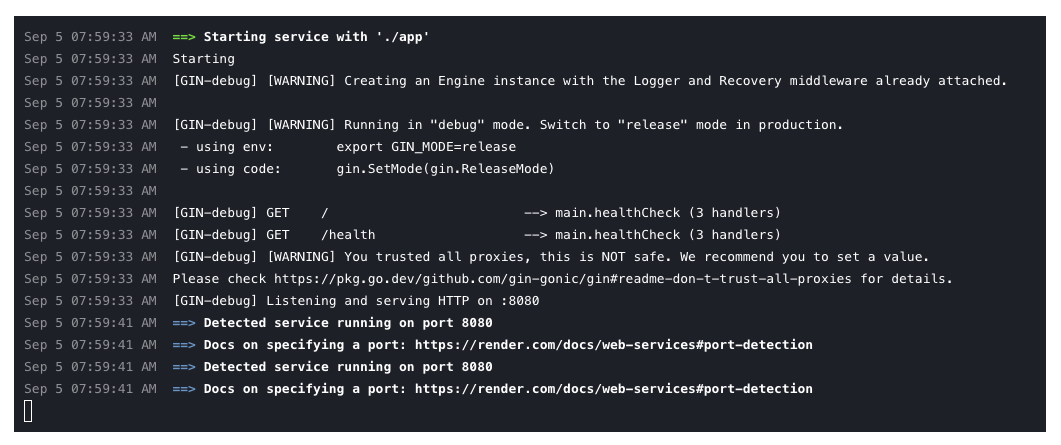
For ports, you can see it determine what port. You can also set it under advance.
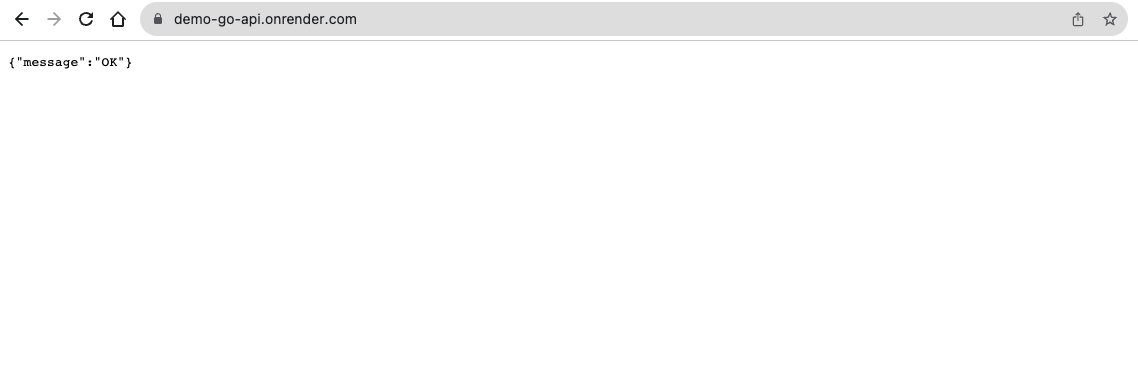
You can see it’s loading our health endpoint. That’s it! You are all setup on Render. Every time you merge to main , it will redeploy all changes. You can configure a custom URL under “Settings”.
Thanks for reading!