Lessons
Deploy MongoDB on Render
In this tutorial, we will deploy a MongoDB instance to Render. As of September 2023, Render doesn’t support a managed instance of Mongo. If you want to use the Render Blueprint, use this link.
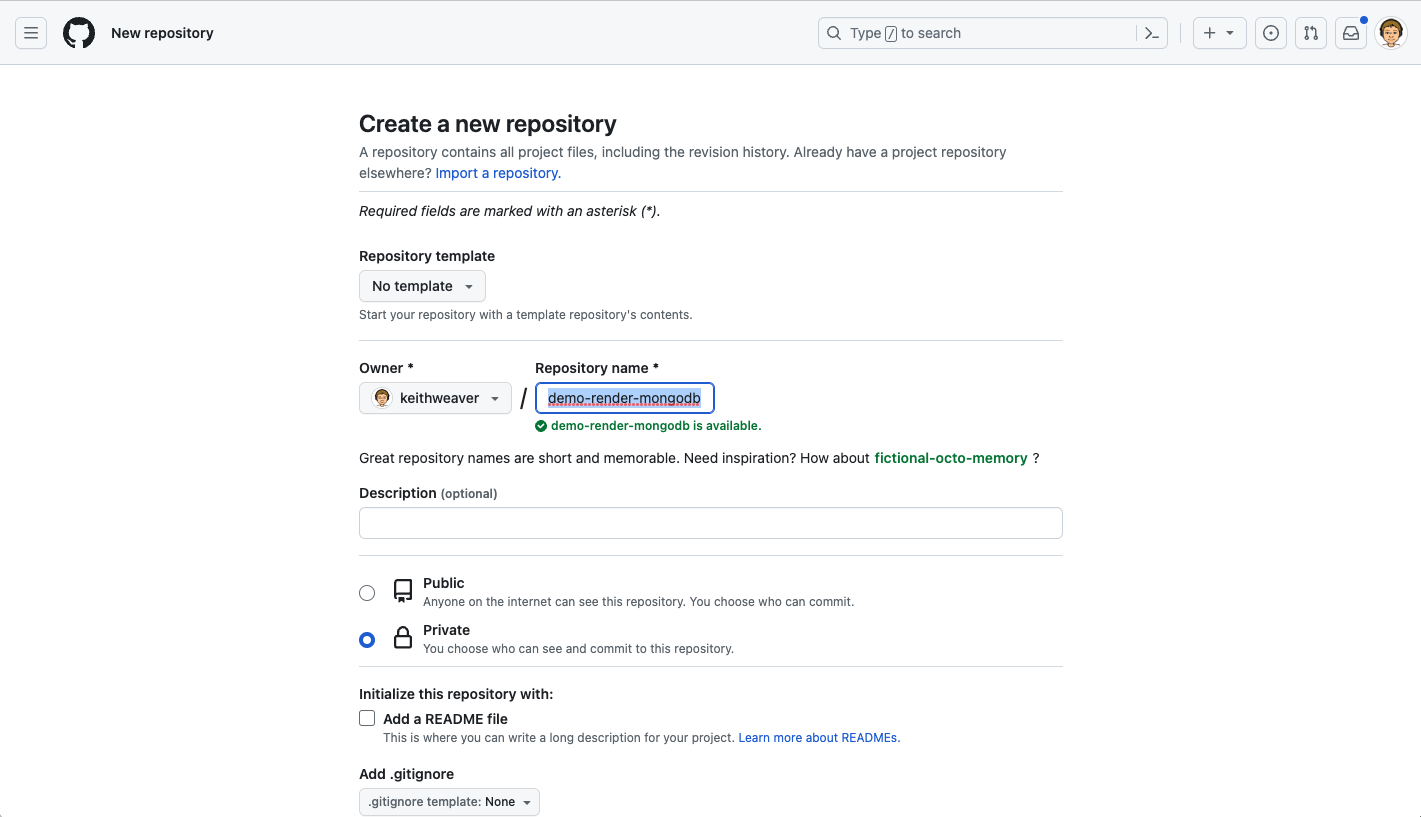
For this tutorial, you will require Github and Render. Start by creating a new Github repository.
We are going to use this template. We are only copying the Dockerfile. Here is the content of the Dockerfile.
1FROM mongo:4.2
Push the Dockerfile to your remote branch.
1 2 3git add --all git commit -m "Dockerfile" git push
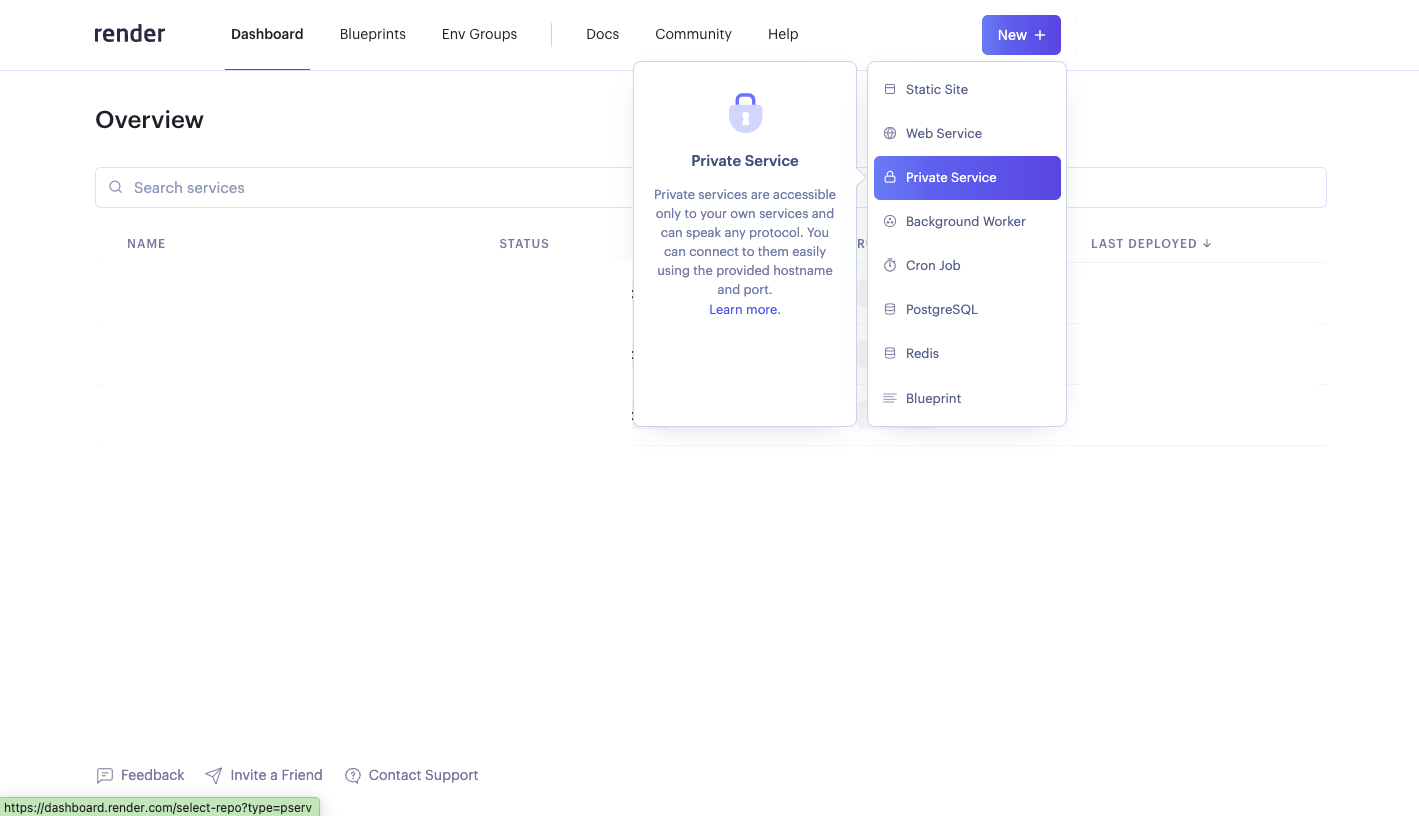
Navigate to your Render account. In the top navbar, hit “New”. Then select “Private Service”. This will mean our service won’t be accessible from the public internet. Only services that are in the same Region and Hosted on Render will be able to access it.
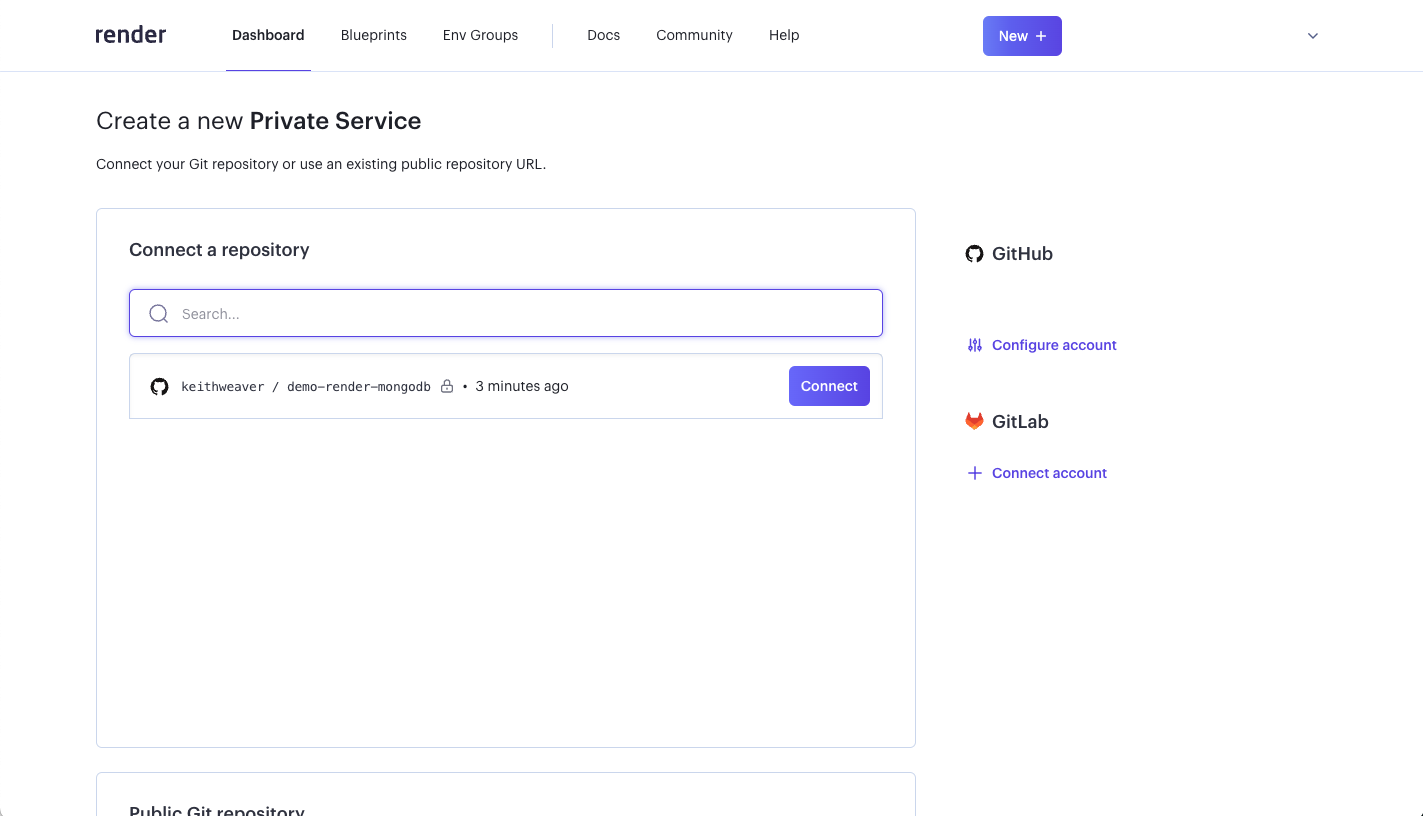
Select the repository, and hit “Connect”.
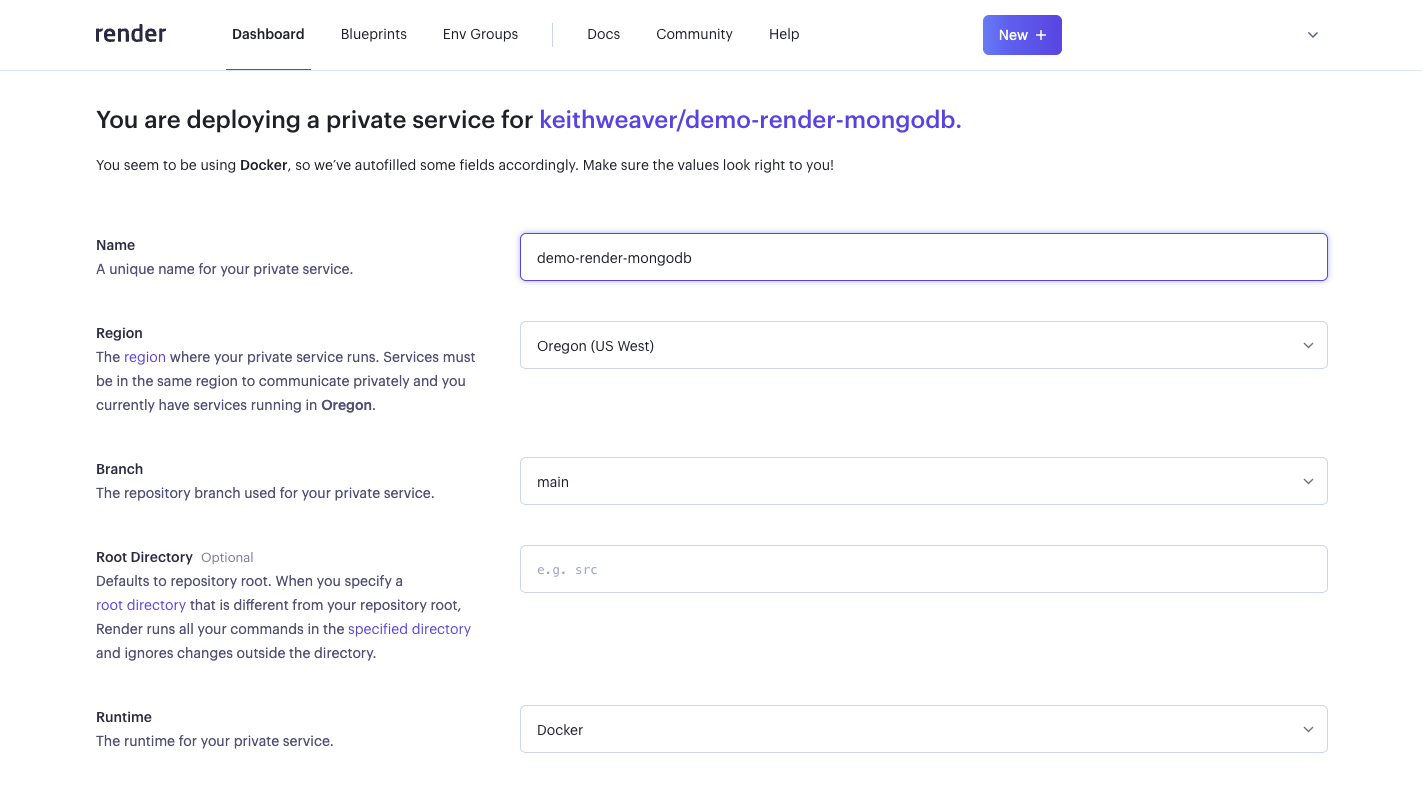
Create a name for the service. Select the “Docker” under the Runtime.
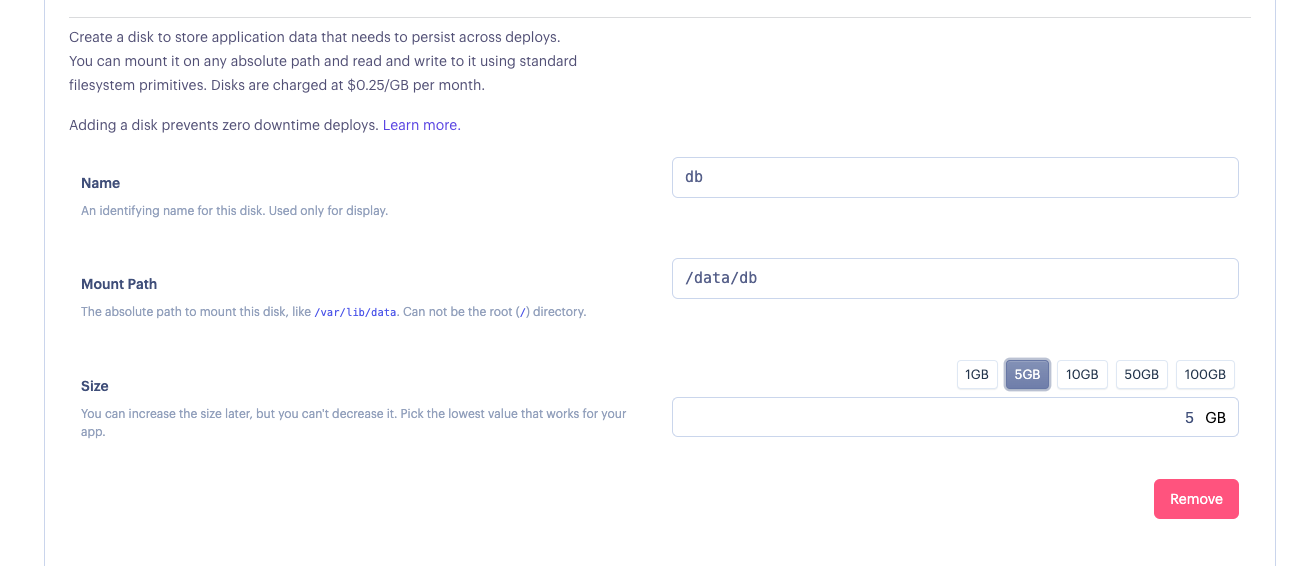
Then click “Advance”, and add a Disk. You can change the disk size to whatever you want.
Once you are set with all fields, then hit “Create Private Service”.
Your new service will spin up.
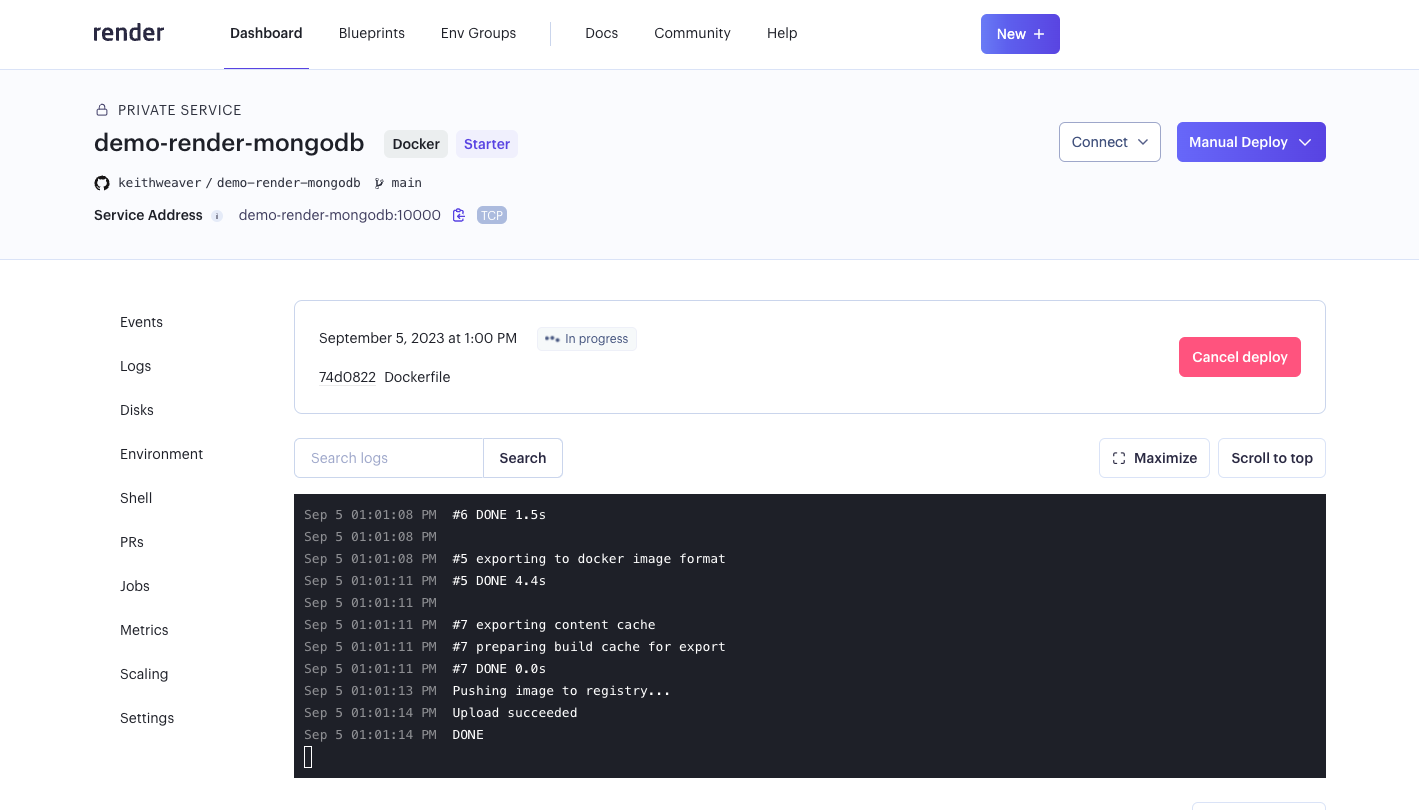
You can see the “service address” to connect to your DB.
You can test the connection by navigating to “Shell”. You can connect:
1mongo --host demo-render-mongodb
Replace “demo-render-mongodb” with your service address (no port). You can exit with
1quit()
That’s it! You are setup on Render with MongoDB.